
Understanding the Installation Process for Split System Air Conditioning
Split system air conditioning is one of the most popular air conditioning systems on the market. It is a type of air conditioning system that consists of two separate units: the outdoor unit and the indoor unit. The outdoor unit contains the compressor and the condenser coil, while the indoor unit contains the evaporator coil and the fan. The installation process for split system air conditioning is simple, but it’s important to understand the steps involved to ensure a successful installation. In this blog post, we will go through the installation process for split system air conditioning.
Step One: Choosing the Right Location
The first step in the installation process for split system air conditioning is choosing the right location for the indoor and outdoor units. The indoor unit should be installed in a place where air can circulate freely, without any obstruction. The outdoor unit, on the other hand, should be installed in a place where it is protected from the elements, such as direct sunlight, rain, hail, or snow.
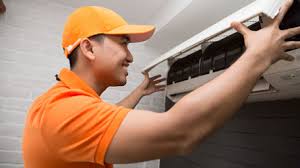
Step Two: Mounting the Indoor Unit
The second step in the installation process is mounting the indoor unit on the wall. The indoor unit should be mounted high on the wall, at a height of about seven feet. It should also be installed perpendicular to the wall and should be level. Once the unit is mounted on the wall, it should be connected to the refrigerant line and the electrical line. For the best air conditioning repairs in West Melbourne hire Extrordinair team.
Step Three: Installing the Outdoor Unit
The third step in the installation process is installing the outdoor unit. The outdoor unit should be installed on a stable base, such as a concrete slab, and should be level. The unit should also be positioned away from any obstacles, such as bushes, trees, or fences, to allow for proper airflow. Once the outdoor unit is installed, it should be connected to the indoor unit using refrigerant lines and control wiring.
Step Four: Electrical Connections
The fourth step in the installation process is making electrical connections. Electrical connections should be made both inside and outside the house. The indoor unit should be connected to a power source, while the outdoor unit should be connected to a disconnect box. It is important to hire a qualified electrician to make these connections to ensure that they are done safely.
Step Five: Testing and Commissioning
The final step in the installation process is testing and commissioning the system. Once the installation is complete, the system should be thoroughly tested to ensure that it is running smoothly and efficiently. The installer should check the refrigerant levels, the airflow, and the temperature readings to ensure that the system is functioning properly. Once the system is commissioned, the installer should provide the homeowner with instructions on how to operate and maintain the system.
Conclusion:
Split system air conditioning is a great investment for any homeowner. It is a system that is easy to install, efficient, and reliable. By following these steps, you can ensure that your split system air conditioning is installed correctly and will provide you with cool and comfortable air for years to come. If you have any questions or need assistance with the installation process, don’t hesitate to contact a professional split system service Melbourne technician.


